Print W-2 Form 
Use this page to generate the actual W-2s.
| Field | Description |
|---|---|
| Tax Year | Tax year being reported. The current year is the default selection. |
| EIN | Employer Identification Number. This entry defaults from the W-2 Employee List page. |
| Employee | Print W-2 for one employee only. Leave this field blank to print W-2s for all employees. |
| Sort By | Employee Name or Department. |
| W-2 Form | Required. W-2 form to be used. |
| Form Type | Employee or Employer. The default selection is Employee. |
| Statuses |
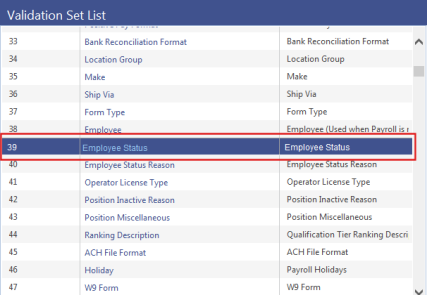
Status(es) for which W-2 forms will be created. Forms will be created for employees who have the selected status(es) as of the date the print job is submitted. The available status selections come from Choosing to create the form for a particular Employee will disable the list boxes. |
After making your entries, click Print to send the file of W-2 forms to myReports.
From myReports, click the Print W-2 Form-Employee or Print W-2 Form-Employer link located on the left side of the page. The form will display on the right side of the page. Check whether the data is aligned properly.
If you need to adjust the margins before printing, breadcrumb back to the Print W-2 Form page, and use the Left and Top margin fields, respectively, to shift the data horizontally and vertically.
When the data alignment is correct, click the Print button located at the bottom of the form in myReports to print only the W-2 displayed, or click Print All to print all of the W-2s in the file.
You may use the Next and Previous buttons to move through the forms, printing only those you need.
If multiple W-2s have been printed, you may use the VCR buttons or select a name from the drop-down and click Submit to move through the list.
Some system configurations may result in difficulty using the VCR buttons. If this occurs, adjust your Internet settings as follows:
- From an Internet Explorer session, navigate to Tools > Internet Options.
- From the Temporary Internet Files section, click the Settings button.
- Set the Check for newer versions of stored pages value to be Every visit to the page. Click OK on both pages to save the new setting and exit.
- If you are printing the form from the PDF file in myReports, click the printer icon in the Adobe toolbar at the top of the preview pane.
- Select the appropriate print options, including None in the Page Scaling field of the Print dialog.
- Click OK.
Note: It is recommended that you first print one form to ensure the paper is loaded correctly in your printer before you print all forms.
Note: The W-2 Z-fold form must be printed on a network printer, due to additional printer setup that needs to be performed.
The Z-fold version of the W-2 form prints on legal-size paper. Printing from New World ERP uses the default paper size for the printer you select, so unless that is the default for your printer, you will need to follow the steps below to change the network printer’s default paper size to Legal:
- Connect to the server that houses the application server or the report server (if installed) by going to Start > Run and typing mstsc /console.
- In the Computer field, type the name of your server and click Connect.
- Log into the server using the administrator log in.
- Select Start > Printers and Faxes.
- Right click the printer you will use to print the Z-fold W-2 forms. Remember that it should have the printer icon that designates a network printer.
- Select Printing Preferences from the menu. Set the default paper size to Legal.
- Click Apply to make the changes.
Note: The log-on user for the service must have rights to the printer that you will use to print the Z-fold forms. This setup has been performed if the printer is available for selection on the myReports page.
- You can now print the W-2 Z-fold forms from the Print W-2 Form page in New World ERP. Remember to select the W-2 Z-Fold or W-2 Z-Fold Blank option in the W-2 Form field. When you select the Print button at the bottom of the preview pane in myReports, the printer will expect legal-size paper to be used.
- Once the forms are printed, return your network printer to its default settings.
To see help for another page in the W-2 Processing workflow, click the appropriate link provided below:
